
Ta-daaaaaaaah! I've finished my first crafty project in my new craft space and let me tell you ... it was incredible to actually be able to find things when I needed them. I was even motivated to put things BACK where I found them. Ahhh ... the crafty bliss ...
So here's the skinny ... the Sketch with a Spin (SSS48) challenge is to make a card using this sketch ...


As I mentioned, I had something special in mind for the butterfly so I also used this challenge as an opportunity to get-to-know my Copic markers a little more. It was hit and miss for me this time since I'm a beginner, a.k.a. Copic marker Diva-wanna-be. I'd start filling in the image and then would decide I didn't like the direction I was headed and start over. I must have done this about 15 times or so before I finally landed on something I could live with. After the entire image was finished, I dotted the "0" marker all over the image. Then I completed the entire image by covering it with Spica to giving it a sparkly appearance.
Before


Here are the Copic colors I used on this project in addition to the "0" or Kryptonite as our friend Sally Lynn MacDonald would say!

Next up ... Crafty Diva night at my house tomorrow! Can't wait!
So here's the skinny ... the Sketch with a Spin (SSS48) challenge is to make a card using this sketch ...

... and to make something "fuzzy-wuzzy" on it. So just for the record, my "fuzzy-wuzzy" element is the flowers. I thought long and hard about making something on the actual butterfly fuzzy but I got inspired to go a different path ...
Copic Creations is celebrating their one year blogversary with a challenge to use your favorite Copic technique (reference Copic Creations Challenge #24). Mine is feather blending.
Here's my take on these challenges:

As I mentioned, I had something special in mind for the butterfly so I also used this challenge as an opportunity to get-to-know my Copic markers a little more. It was hit and miss for me this time since I'm a beginner, a.k.a. Copic marker Diva-wanna-be. I'd start filling in the image and then would decide I didn't like the direction I was headed and start over. I must have done this about 15 times or so before I finally landed on something I could live with. After the entire image was finished, I dotted the "0" marker all over the image. Then I completed the entire image by covering it with Spica to giving it a sparkly appearance.
Before
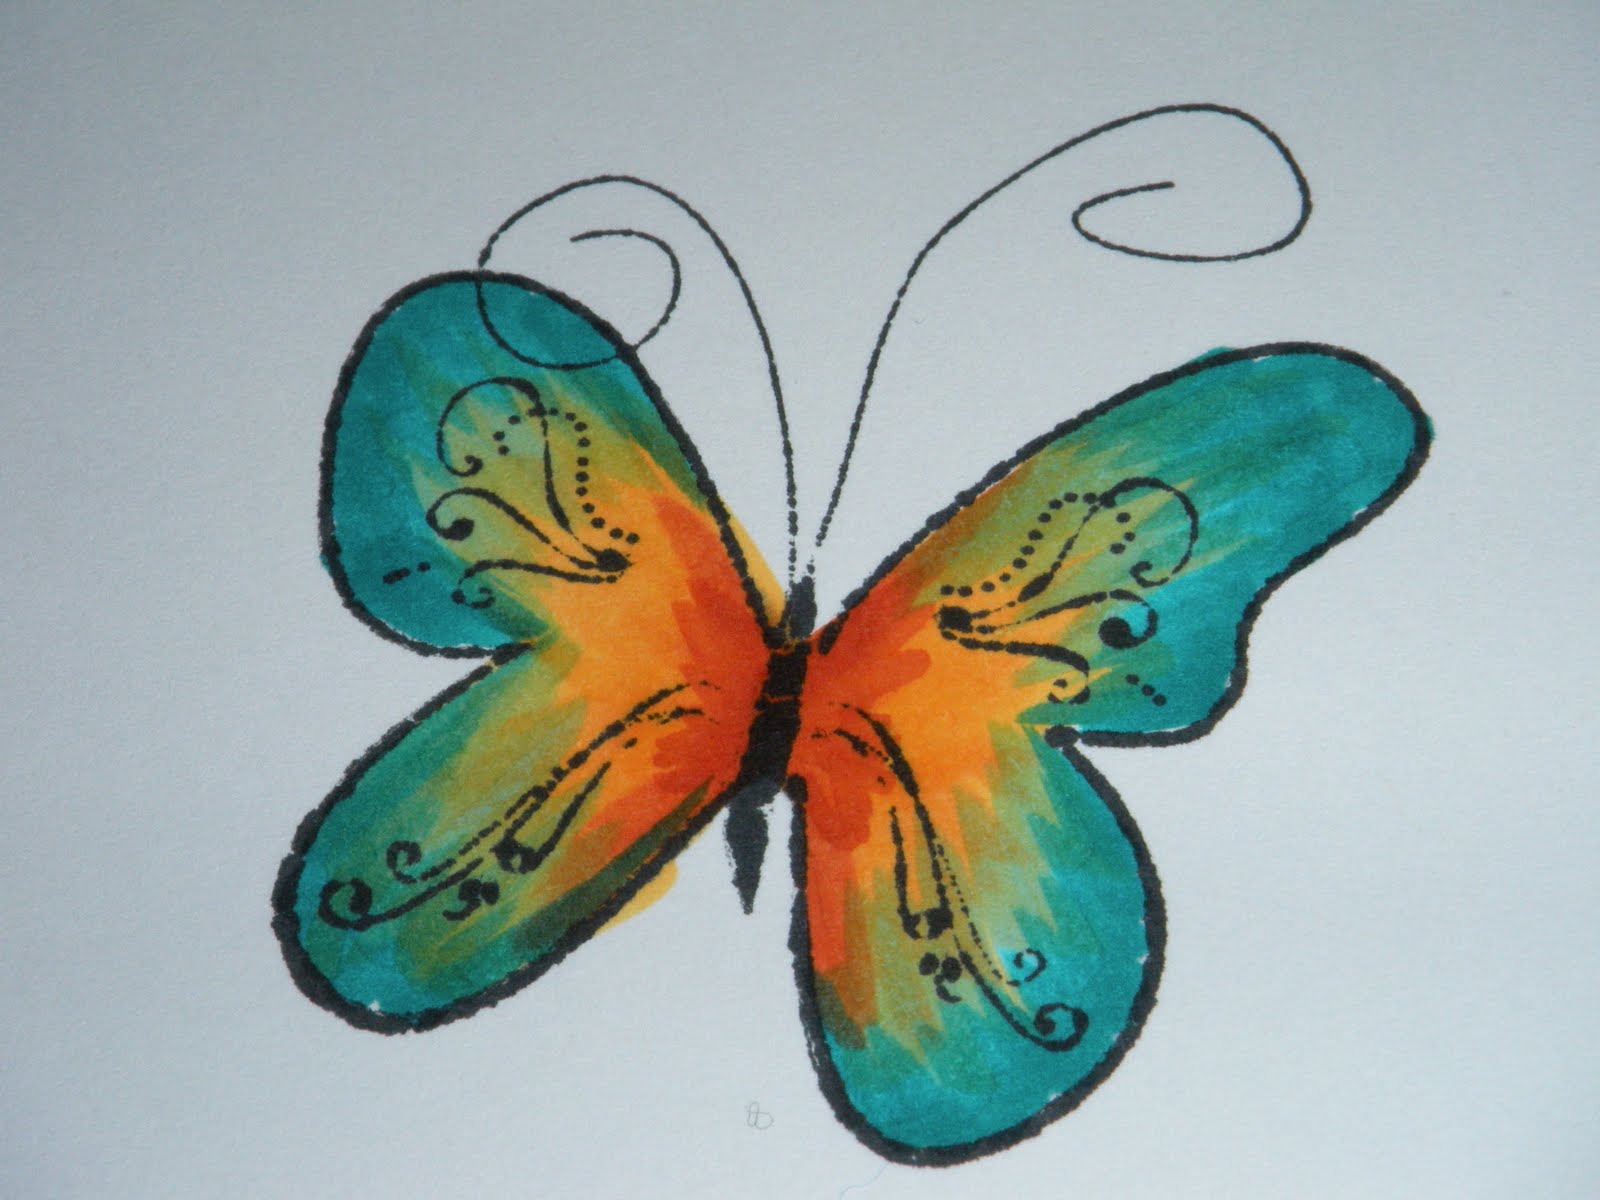
After

Here are the Copic colors I used on this project in addition to the "0" or Kryptonite as our friend Sally Lynn MacDonald would say!

Supplies
Paper: Bo Bunny (Shiitake Dot); Pink Paislee (Confidential & Ragged)
Stamps: Autumn Leaves and Studio G
Ink: Momento (Tuxedo Black)
Markers: Copic; Spica (Black, Clear)
Other:
Karen Foster (Round Biggie Brads);
Imaginisce Bazzill Collection (Bling Buds);
Daisy Ribbon Felt
Die-cuts: Spellbinders
Next up ... Crafty Diva night at my house tomorrow! Can't wait!


